
Greenlite SEM: Setting Up Tag Manager
Welcome to the Greenlite Learning Center
Introduction to Tag Manager:
Using Google Tag Manager

If you've never set up a Google Tag Manager account, don't worry, it's really a simple process. Also, if you don't have an existing Google Account you will need to create one. For the sake of this article, however, let's say you do have one and are ready to set up your Tag Manager account.
Go to tagmanager.google.com
Once there, the steps outlined in the article below will guide you through the fairly easy set up. Have fun!
Tag Manager is a platform built to allow you to maintain and update "tags" on your website or mobile applications. Set up is simple as adding a bit of code to the <HEAD> section of your website and you're ready to go. Once installed you're able to track analytical data across web-based interfaces safely and easily. Tag Manager servers communicate with your website or app so that you can use this gathered data to better understand, interpret and utilize data concerning your website and optimize it to grow your business. If you need more help or someone to set things up for you, contact the marketing team here at Greenlite SEM today.
Set Up your Google Tag Manager Account
Step 1: Once in the Google Tag Manager platform you must name your account and set up your container.
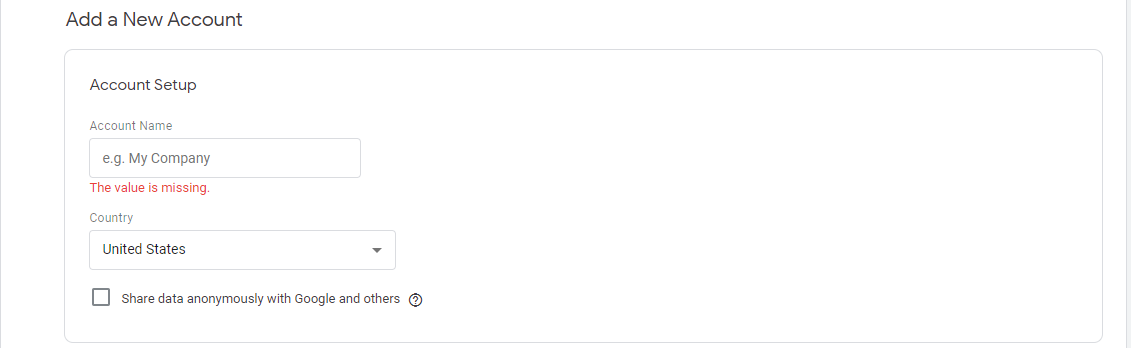
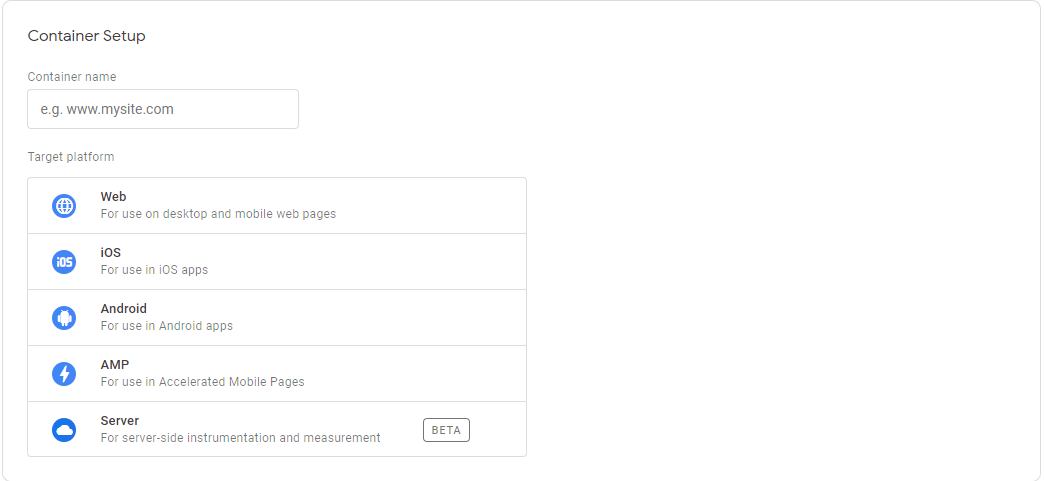
Step 2: Name your container and select the platform your planning to target with your tag.
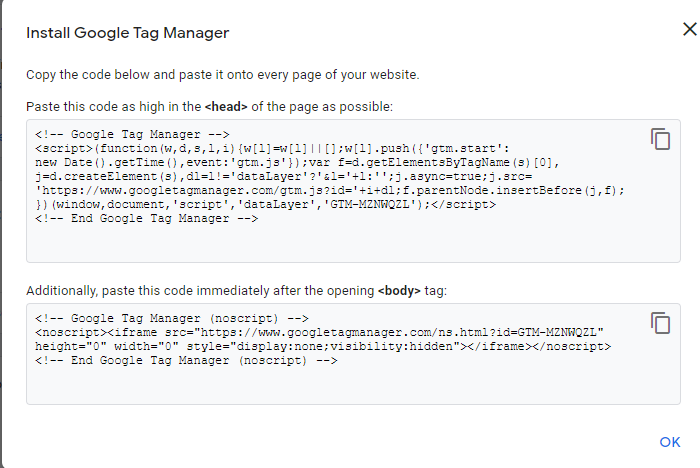
Step 3: A version of the code below that GTM produces needs to be added to the page or widget you want to track. Add it to the <HEAD> section of your site or follow your website platforms installation guidelines.
Step 4: This is your GTM container workspace dashboard. Here you can configure tags and trigger settings to record data directly from you website.
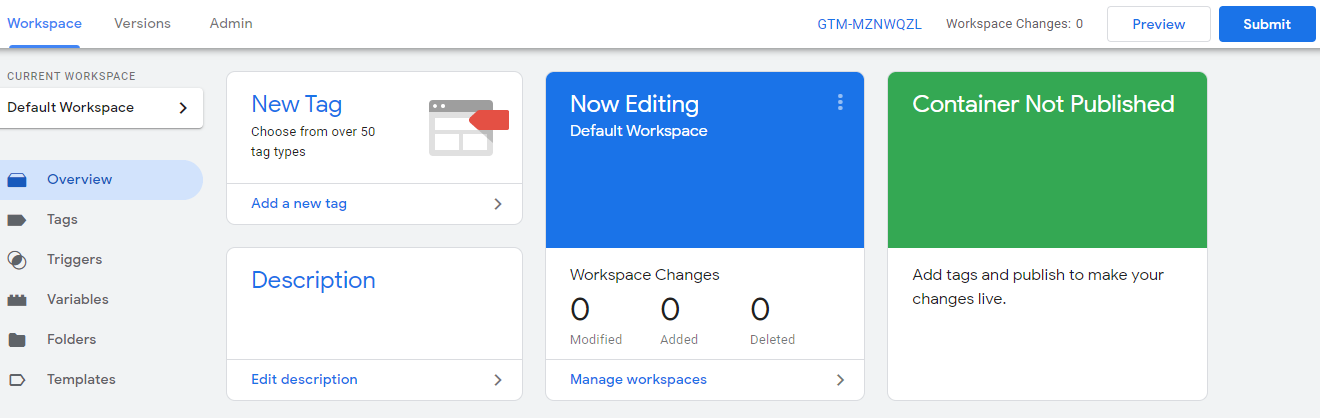
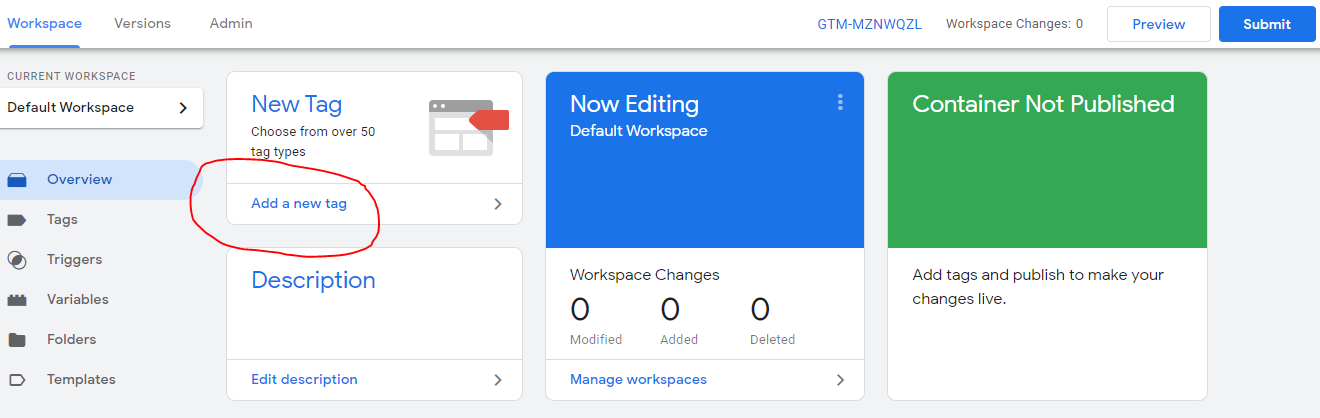
Step 5: You have created your container and arrived at your dashboard. Click the "Add a new tag" to configure your tag settings.
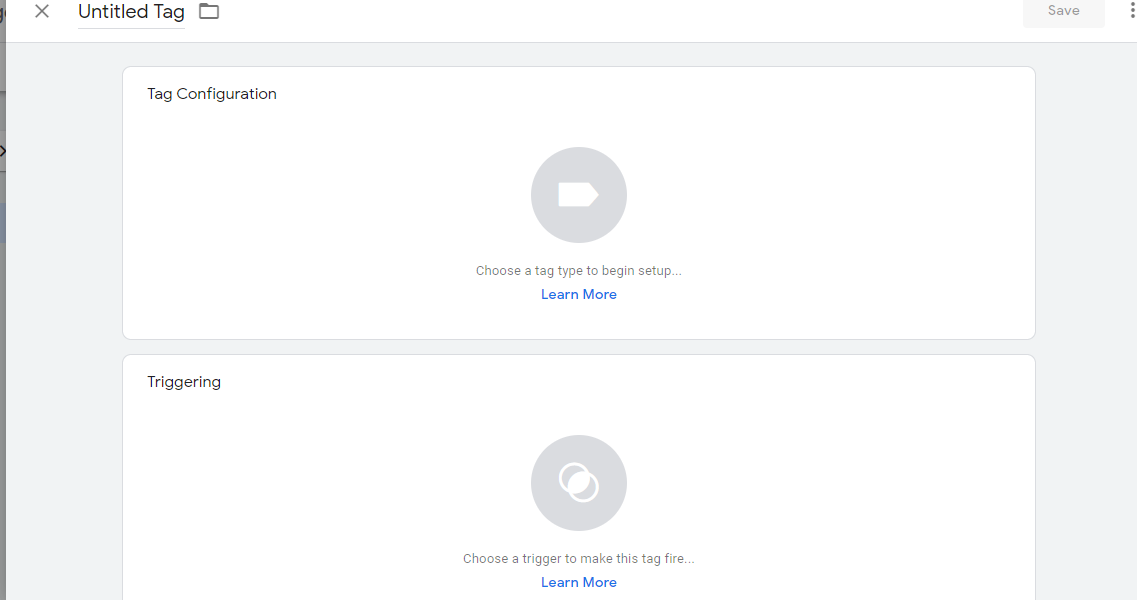
Step 6: Now it's time to configure your tag. Rename it to something identifying it's purpose and click the tag configuration button.
Step 7:
Step 8: New Paragraph